

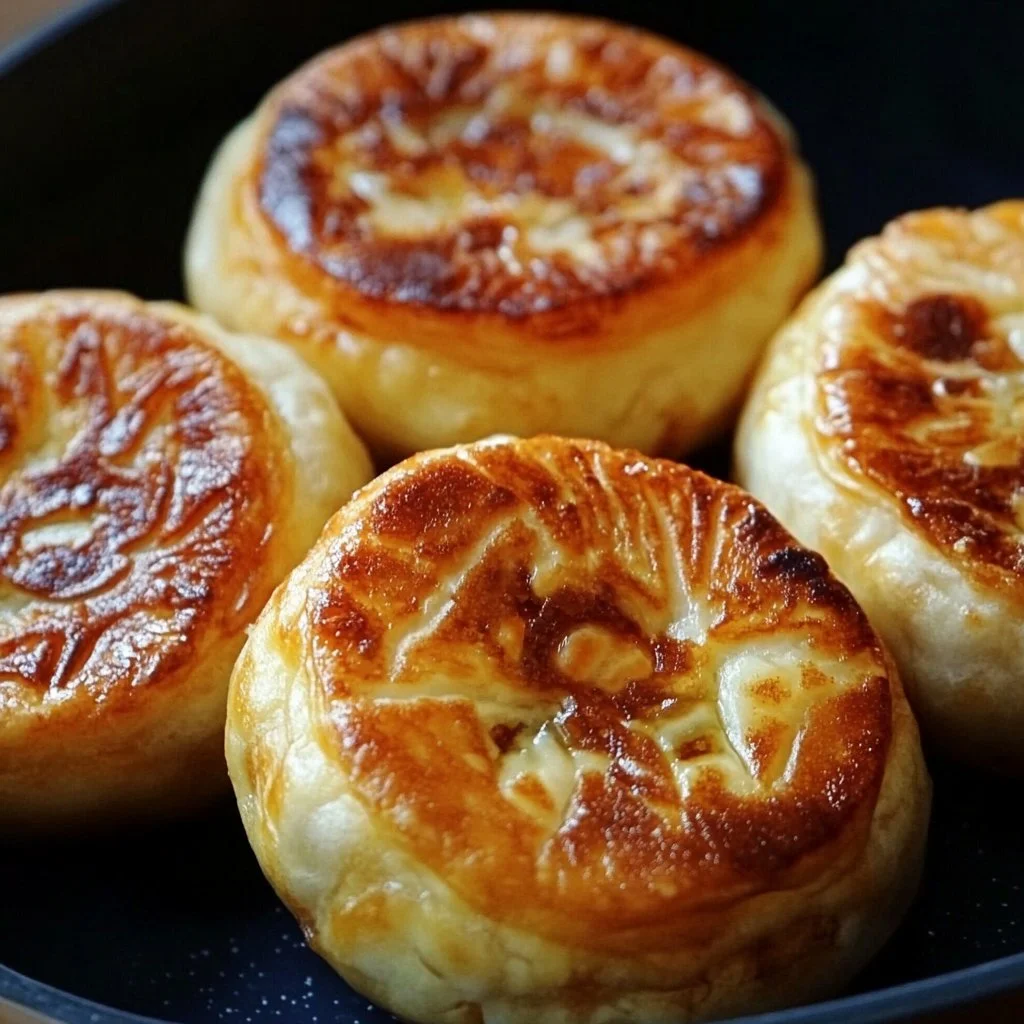
I first made these vegan pan-fried buns (Sheng Jian Bao) on a rainy weekend when I wanted something comforting and handheld. They’re fluffy on top, crisp and sesame-speckled on the bottom, and packed with a savory cabbage–vermicelli filling that stays juicy thanks to a quick pan-steam finish. If you enjoy easy, family-friendly recipes with texture contrasts, you’ll love how these come together—plus they’re a great way to sneak extra veg into a meal. If you like simple family dishes in the same vein, try this vegan garlic chickpea soup for a warming follow-up.
Why you’ll love this dish
These buns give you the best of several worlds: the chew of classic steamed bao, the crunch of a fried dumpling base, and the comfort of a savory hand pie. They’re wallet-friendly, mostly pantry-driven, and perfect for feeding a crowd because you can scale the batch easily. Make them for weekend brunch, casual dinner, or a potluck where everyone can pick their favorites.
“Crispy bottoms, soft tops, and a filling that never feels heavy—my family keeps asking for these again.” — home cook review
What makes them especially useful:
- Quick weeknight option if you prepare filling ahead.
- Kid-approved because the filling is familiar and mild.
- Vegan and adaptable: swap soy milk, use different oils, tweak seasonings.
Preparing Vegan Pan-Fried Buns (Sheng Jian Bao)
Before you begin: this recipe breaks into three main phases — dough, filling, and assembly — followed by a short pan-fry + steam that gives each bun its signature texture. Expect about 1.5–2 hours total (most time is dough rising), 30–40 minutes active hands-on work.
Overview of the process:
- Make and proof a soft yeast dough; let it rise once.
- Cook and season the cabbage–vermicelli filling; cool.
- Divide dough, roll wrappers, fill and pleat into buns.
- Pan-fry buns bottoms until golden, add water, cover to steam through.
- Finish with sesame seeds and toasted sesame oil.
What you’ll need
- 3 cups all-purpose flour (375 g)
- 2 tsp instant dry yeast
- 2 tbsp sugar
- 1/2 tsp salt
- 1 tbsp roasted sesame seeds (for dough and finishing)
- 1 cup warm soy milk (or other nondairy milk; ~105–115°F / 40–46°C)
- 1 tbsp toasted sesame oil (or neutral oil) — for dough flavor
- 1 tbsp neutral oil (for cooking)
- 6 cups raw shredded cabbage (from ~1/2 large head)
- 3.5 oz vermicelli noodles, uncooked bundles (100 g) — rice or mung bean vermicelli both work
- 1 cup finely shredded/grated carrot (150 g)
- 1/2 cup chopped scallions or chives (25 g)
- 1 tbsp soy sauce
- 2 tsp salt (or to taste)
- 1 tbsp roasted sesame seeds (for topping)
- 2 tbsp toasted sesame oil (for finishing filling and brush)
Ingredient notes and substitutions:
- Soy milk can be swapped for almond or oat milk; just keep it warm for yeast activation.
- If you prefer extra umami, add 1 tsp mushroom powder or a splash of mushroom soy sauce.
- For gluten-free buns, this dough won’t work; consider rice-flour-based recipes instead.
Directions to follow
Preparing the Dough
- Combine warm soy milk, sugar, and yeast in a bowl. Let sit 5–10 minutes until foamy. If it doesn’t foam, your yeast may be inactive.
- In a large bowl, whisk flour and 1/2 tsp salt. Make a well and add the foamy yeast mixture plus 1 tbsp toasted sesame oil.
- Mix until a shaggy dough forms. Knead on a lightly floured surface 8–10 minutes until smooth and elastic.
- Place dough in an oiled bowl, cover with a damp towel, and let rise until doubled (about 45–60 minutes in a warm spot).
Cooking the Filling
- Soak the vermicelli in hot water 5–7 minutes until pliable. Drain, chop into short lengths.
- Heat 1 tbsp neutral oil in a wide skillet over medium heat. Add shredded cabbage and carrots. Sauté until cabbage wilts and releases most liquid, about 6–8 minutes.
- Season with soy sauce and 2 tsp salt (start with less and adjust). Add chopped vermicelli and scallions. Cook another 2 minutes.
- Stir in 2 tbsp toasted sesame oil and 1 tbsp roasted sesame seeds. Taste and correct seasoning. Let mixture cool completely; squeezing excess liquid if needed will help wrappers stay dry during assembly.
Preparing the Wrappers
- Punch down the risen dough. Divide into 24 equal pieces (about 30–35 g each).
- Roll each piece into a ball, then press and roll into 3–3.5 inch rounds with a slightly thicker center and thinner edges.
Making the Buns
- Spoon ~1–1.5 tbsp of filling into the center of each wrapper.
- Pleat the edges and pinch to seal at the top, making sure there are no holes. Place finished buns seam-side up on a floured tray.
Cooking the Buns
- Heat a large nonstick or cast-iron skillet over medium heat. Add 1 tbsp neutral oil and spread.
- Place buns seam-side down in the skillet, leaving a little space between each.
- Pan-fry until bottoms are golden brown, about 3–4 minutes.
- Carefully pour in 1/4 cup water per 6–8 buns (just enough to create steam, not to submerge them). Immediately cover with a tight-fitting lid.
- Steam for 6–8 minutes until dough is cooked through. Remove lid and cook 30–60 seconds to re-crisp bottoms.
- Brush tops with a touch of toasted sesame oil and sprinkle roasted sesame seeds.
Storing the Cooked Buns
- Cool to room temperature no longer than 2 hours, then refrigerate in an airtight container up to 3 days.
- Reheat in a skillet with a splash of water and a lid for 3–4 minutes, or steam until hot. Heat ensures safe serving and preserves texture.
Freezing the Buns
- Freeze raw assembled buns on a tray until solid, then transfer to a freezer bag up to 2 months.
- Cook from frozen: pan-fry an extra minute, then steam covered for 10–12 minutes from frozen.
- To freeze cooked buns, cool completely and pack airtight up to 2 months. Reheat from frozen in a covered skillet with a splash of water or in a steamer.

Best ways to enjoy it
Serve these buns warm with a simple dipping sauce: 2 tbsp soy sauce, 1 tbsp rice vinegar, pinch of sugar, and minced chili or scallion. They’re excellent with quick sides like a cucumber salad or miso-glazed eggplant. For a full meal, pair them with a light soup and finish with something sweet—try a chilled vegan peanut butter mousse with chocolate ganache to balance savory richness.
Storage and reheating tips
- Refrigeration: store cooked buns in an airtight container up to 3 days; consume within that window.
- Reheating: skillet method keeps bottoms crisp. Microwaving is faster but softens crust; if you microwave, then pan-crisp bottoms for 30–60 seconds.
- Food safety: cool leftovers within 2 hours and reheat to at least 165°F (74°C) before eating.
Helpful cooking tips
- Dry filling: squeeze shredded cabbage in a clean towel to remove excess moisture so wrappers don’t get soggy.
- Even pleats: practice with one or two buns to get pleating technique before assembly line.
- Heat control: medium heat gives color without burning; reduce to low if bottoms brown too quickly.
- Test bun doneness by cutting one open: no raw dough and steam escaping indicates done.
- If yeast fails: use a bit more time for rising in a warmer spot (oven with light on) or test another packet of yeast.
Creative twists
- Add mushrooms (finely chopped shiitake) and a splash of dark soy for deeper umami.
- Make them spicy: stir diced kimchi into the filling and reduce added salt.
- Switch grains: swap vermicelli for finely chopped glass noodles or small diced tofu for texture.
- Toppings: use sesame seeds, toasted scallions, or a sprinkle of chili flakes on top before final steam.
- For a heartier version, fold in minced seitan or tempeh for extra protein.
Common questions
How long does the whole recipe take from start to finish?
Active time is about 30–40 minutes. Including dough rise and cooling the filling, plan 1.5–2 hours. Rising times vary by temperature.
Can I make the buns ahead and freeze them?
Yes. Freeze assembled raw buns on a tray until firm, then transfer to a bag for up to 2 months. Cook from frozen by adding a little extra steaming time.
How do I prevent soggy bottoms?
Squeeze excess water from the filling; brown the bottoms well before steaming; and do not overpour water when steaming—use just enough steam to cook through.
Is it okay to use instant yeast right in the flour rather than proofing?
You can mix instant yeast directly with flour if your soy milk is just warm enough. However, proofing first confirms yeast activity and reduces risk of dense dough.
Can I substitute the vermicelli with something else?
Yes—short-grain rice noodles, finely diced tofu, or very small cubed mushrooms work. Just keep pieces small so they wrap easily.
How should leftovers be reheated to keep texture?
Reheat in a skillet with a teaspoon of water and a lid for a few minutes to steam through, then remove lid to re-crisp bottoms.
PrintVegan Pan-Fried Buns (Sheng Jian Bao)

Delicious vegan pan-fried buns with a savory cabbage and vermicelli filling, featuring a crispy bottom and fluffy top.
- Prep Time: 60 minutes
- Cook Time: 30 minutes
- Total Time: 90 minutes
- Yield: 24 servings 1x
- Category: Snack
- Method: Pan-frying
- Cuisine: Chinese
- Diet: Vegan
Ingredients
- 3 cups all-purpose flour (375 g)
- 2 tsp instant dry yeast
- 2 tbsp sugar
- 1/2 tsp salt
- 1 tbsp roasted sesame seeds (for dough and finishing)
- 1 cup warm soy milk (or other nondairy milk; ~105–115°F / 40–46°C)
- 1 tbsp toasted sesame oil (or neutral oil)
- 1 tbsp neutral oil (for cooking)
- 6 cups raw shredded cabbage (from ~1/2 large head)
- 3.5 oz vermicelli noodles, uncooked bundles (100 g)
- 1 cup finely shredded/grated carrot (150 g)
- 1/2 cup chopped scallions or chives (25 g)
- 1 tbsp soy sauce
- 2 tsp salt (or to taste)
- 1 tbsp roasted sesame seeds (for topping)
- 2 tbsp toasted sesame oil (for finishing filling and brush)
Instructions
- Combine warm soy milk, sugar, and yeast in a bowl. Let sit 5–10 minutes until foamy.
- In a large bowl, whisk flour and 1/2 tsp salt. Make a well and add the foamy yeast mixture plus 1 tbsp toasted sesame oil.
- Mix until a shaggy dough forms. Knead on a lightly floured surface for 8–10 minutes until smooth and elastic.
- Place dough in an oiled bowl, cover with a damp towel, and let rise until doubled (about 45–60 minutes).
- Soak the vermicelli in hot water for 5–7 minutes until pliable. Drain and chop.
- Heat 1 tbsp neutral oil in a skillet over medium heat. Add shredded cabbage and carrots. Sauté for 6–8 minutes until wilted.
- Season with soy sauce and 2 tsp salt, then add chopped vermicelli and scallions. Cook another 2 minutes.
- Stir in 2 tbsp toasted sesame oil and 1 tbsp roasted sesame seeds. Let mixture cool completely.
- Punch down the risen dough, divide into 24 equal pieces, and roll each into a round about 3–3.5 inches.
- Spoon 1–1.5 tbsp of filling into each wrapper, pleat the edges, and pinch to seal, placing buns seam-side up on a floured tray.
- Heat a skillet over medium heat, add 1 tbsp neutral oil, and place buns seam-side down.
- Pan-fry until golden brown (about 3–4 minutes), then pour in 1/4 cup water, cover, and steam for 6–8 minutes.
- Remove lid, cook for an additional 30–60 seconds to re-crisp the bottoms, then brush with toasted sesame oil and sprinkle with sesame seeds.
Notes
Refrigerate cooked buns for up to 3 days; they can also be frozen for future use.
Nutrition
- Serving Size: 1 bun
- Calories: 150
- Sugar: 2g
- Sodium: 300mg
- Fat: 5g
- Saturated Fat: 1g
- Unsaturated Fat: 4g
- Trans Fat: 0g
- Carbohydrates: 23g
- Fiber: 2g
- Protein: 4g
- Cholesterol: 0mg


